Wednesday 30 January 2013

Project 42: man-made landscapes


I have chosen three man-made landscapes that differ as much as possible.  Each picture was taken for a different purpose.

I took this shot from the top of Whitby Abbey steps as I was there to take an image for Project 29: recreating a well-known image by Joe Cornish.  That image was taken lower down the steps but I very much liked this more expansive view across the harbour to the town beyond.  For this picture I wanted to show the lights of Whitby but I didn't want it to be a night shot as such.  I timed it for twilight while there was still some light in the sky. 

This was another image taken with this course in mind.  At the time I was considering  using Fay Godwin as the subject for assignments 4 and 5.  In her book 'Land' I had noticed that she had included man-made objects in some of her landscapes which could be thought of as ugly, including a pill-box such as this one on the Lincolnshire coast.  My thoughts were to take a series of landscapes with 'ugly' man-made intrusions.  I liked this pillbox because of its textures and the lichens growing on it and the way it was settling into the trees.  Nature is taking over once more.  In retrospect I maybe should have made the pill-box smaller in the picture as it is probably more of an architectural shot.

Again maybe more of an architechural shot than a landscape but one I had wanted to  capture for a long time.  It is the gatehouse of nearby Thornton Abbey.  I had spent quite some time there and had to remain until latish on in the afternoon for the sun to move round far enough to light up the front of the building.

This is Derwent dam, Derbyshire once used as a practice target for the famous 617 squadron prior to the controversial raid on the Ruhr Valley during the second world war.  Despite the wet weather we have experienced over the last year, prior to that there had been a drought.  It had been several years since I had seen the water cascading over the dam wall.  Rather than take a frontal shot I wanted to show the dam within the landscape but this wasn't easy as it was difficult to get far enough away.  I also wanted it to be a reminder of past history and also to illustrate the way man has adapted the landscape for his own use - in this case the procurement of water for nearby Sheffield.


Ladybower and Derwent Reservoirs, Derbyshire. This photograph is much more of a 'pure' landscape and one that I used for assignment 3 on the theme of water.  I wanted to portray man's use of water for drinking and industry.  It is also used for leisure by trout fishermen, walkers and mountain bikers.  The curving lines through the picture lead the eye into it.  The rainwater in the puddle on top of Bamford Edge echos the water in the reservoir.  The dam wall and the viaduct are reminders of man's influence and a reminder also of the two villages that were flooded to create the reservoirs.


This is a picture of Thoresway Church in the Lincolnshire Wolds taken last summer.  It  is part of a  collection of images that I took as a possible theme of churches in the landscape for assignment 3.  I wanted to show the church as part of the landscape rather than being an architectural shot.  In fact the whole of this landscape can be said to be man-made.  At one time it would have been forested, but in more recent years it was downland up to the first world war when much land went under the plough.  It is however typical of much on the 'natural' landscape of lowland England.
What Have I Learned?
Much of the landscape in the British Isles has been altered in some way by man.  In many instances this is not overly detrimental but there are many cases where the hand of man has severely damaged the environment.  Although it is not an avenue I have gone down myself, it is a theme of others.  Fay Godwin followed this theme in 'Forbidden Land' and Robert Adams took similar photographs in the American West.  It is possible to photograph man-made landscapes and still have pleasing, interesting and 'beautiful' images; it is also possible to photograph 'the ugly' in order to help the environmental and conservation cause.

Project 41: grain

Again this is a project designed with black and white film in mind.  I again decided to experiment digitally.

Although not really a pure landscape as such I used this photograph of an alley that I took  in Perugia last spring.  I chose this image as I felt that it suited a grainy feel.  After converting to Black and White in Lightroom I added grain by using the grain sliders.  I have deliberately not been very subtle in the hope that the grain stands out when viewed in Blogger.
I also felt that the image might benefit by being sepia toned.  I think this may have brought out the grain somewhat.
What Have I Learned?
Generally I try to avoid noise/grain in my images as much as possible and occasionally use Neat Image software to reduce the noise.  I will particularly try to avoid noise in my images for Assignment 5 as part of Ansel Adams style was to produce sharp, grain-free images printed on smooth paper.  However, noise can be introduced into digital images by using high ISOs or in software packages.

Project 39: printing a back lit subject

Although this project is optional and designed for the printing of a black and white negative, I decided to try it digitally.  I used the colour image below as a starting point.  I took the shot in December 2012 whilst out walking in Derbyshire and produced the accompanying Black and White image in Lightroom.

This is my original starting image with bright highlights in the sun and on the ice on the path in the foreground.

First I converted the picture to Black and White.  I next used an ND grad to reduce the exposure in the sky by 1.5 and also reduced the highlights further.  I also slightly increased the contrast and the clarity.  I then used the adjustment brush to reduce the exposure on the ice on the path in the foreground.  Finally I adjusted the sliders in the Black and White mix until I achieved a result that I was happy with.
What Have I Learned?
I find that I am slowly gaining expertise in producing Black and White Images through using post processing software.

Tuesday 29 January 2013

Project 38: burning in the sky

Although I work in digital I have decided to have a go at these next black and white projects, especially as my choice of photographer for assignments 4 and 5 is Ansel Adams and I shall therefore be working in black and white for assignment 5.

For this first image I worked on one that I took in Derbyshire at New Year 2013.  It was a showery day with brief spells of wonderful light.
As we returned to Hartington along the side of the valley towards the end of our walk, I could see that there were wonderful shafts of light passing at right angles across the valley as the stiff breeze kept the clouds moving quickly.  I took a few images and this is one that I have not processed.  It can be seen that the sky is overexposed and shows no detail.

This second image was converted to black and white in Lightroom.  Rather than working in photoshop and  using the burn tool on the sky, I continued to work in Lightroom selectively using the ND Grad facility on the sky to balance the tones.  I also decresed the highlights a little and incresed the contrast in the sky.  I then increased the contrast in the whjole image slightly and added some clarity.
This an image taken last July close to home on Tetney Marshes.  The clouds and lighting were superb on this particular evening and I decided to make the sky the subject of the image.  I first processed the colour image in Lightroom and then converted the image to Black and White and increased the contrast in the whole image.  The clouds in the top right were now much too dark so I used an angled ND grad to lighten that corner of the sky a little.  The base of clouds was too light so I used an ND grad from the bottom top darken them but this made the foreground too dark so I used a second one to lighten the sky again.  Finally I increased the clarity of the whole image slightly.
What Have I learned?

It is possible with digital photography to create Black and White Images either in camera or in post processing.  Not all conversions from colour work and it is useful to try and 'see in Black and White' in the first instance - not easy in this day of colour photography.  Some shots that I thought would make excellent dramatic Black and Whit Images just didn't work, yet the same scene under different lighting has made an excellent image.  In post processing there are several ways of achieving the same end.  There are even software packages such Nik Silver Efex Pro that are designed specifically to process Black and White.

Project 37: ways of dramatising landscape

 In answering this project I have looked through my images to find examples of each of the suggested methods of dramatising an image and have have also attempted to find examples of others.

Inherently Spectacular Subjects.

Here I have chosen a dramatic cliff taken on a walk last December along Derwent Edge in Derbyshire.  The cliff in the foreground is The Wheelstones; in the background is White Edge.

This is dramatic cliff and stack scenery in Mallorca taken in the last of the evening light.
Extreme Wide Angle

Many images are dramatic for more than one reason.  Here we have a very wide angle shot (20mm) as well as dramatic cliff scenery on Mallorca's Formentor Peninsular.

Closer to home here.  A dramatic wide angle shot (17mm) of some washed up driftwood and a dramatic sky over Tetney Marsh near to Grimsby.

Rich Colours at Sunrise or Sunset.

Cleethorpes Pier at sunrise in February 2010

A dramatic sunrise taken aty Worlaby Carrs in January 2013. I was out photographing short-eared owls and could see that it was going to be a good sunset so I decided to photograph it with the 500mm lens I was using for the owls.  So, also an example of a dramatic landscape using extreme telephoto..

Sunrise produces dramatic colours in the  Hope Valley of Derbyshire.  Taken from Higgar Tor in October 2011
Back Lighting

The drama of these cliffs on Mallorca's Formentor Peninsular is enhanced by the  backlighting.

Here backlighting adds to dram to this winter scene on Derbyshire's Derwent Edge.

Taken on a walk from Hartington at New Year 2013.  As we returned  along the side of the valley we were walking into the light and I noticed the sunbeams moving at right angles across the valley as the strong breeze kept the clouds moving.  I used an ND Grad to balance the light in the sky.
Unusual Composition

I moved in extremely closely for this shot of the Formentor Lighthouse on Mallorca.
Dramatic Skies

Dramatic  sky over Tetney Marshes, Lincolnshire

Towering cumulonimbus clouds persuaded me to make the sky the subject of this image.


Storm clouds over the Humber Estuary at sunset.

Dramatic Lighting


Sometimes it pays to be in the right place at the right time.  This is a walk in upper  Dovedale from Hartington that we have done many times and I photograph the view regularly.  It looks up Dovedale  passed Pilsbury Castle to Chrome Hill in the far distance.  On this particular occasion (New Year's Day 2013) the weather was very cold and showery with a strong breeze keeping the clouds constantly on the move.  When the sun came out the light was fabulous.  I could see this patch of sunlight moving down the valley towards me and prepared for the shot whilst trying to protect the camera from the rain.  As the sun lit up Pilsbury Castle I pressed the shutter.  This much I had visualised as the light came down the valley, but the bonus was the rainbow picking out Pilsbury Castle itself.
 Isolated Subject and Simplicity of Image.

Again, taken in Derbyshire this New Year.  This is a tree I have photographed on previous occasions as it  always makes a pleasing subject.  On this occasion wonderful light and a black sky add drama to the simple image of a tree on the skyline.
Another simple image of a tree on the skyline, this time a rare Elm.  As  the ground was snow covered and the sky was grey and featureless I saw this as an opportunity for a high key image.  in Lightroom I converted the almost monotone image to Black and white and then increased the exposure of the highlights and also increased the contrast to produce this simple but dramatic high key image.

Monday 28 January 2013

Project 36: defining a style.

The idea in this project is to look at the work of a few photographers and analyse their style writing about in around 100 words.  I have decided to begin with Robert Adams.  When I was researching photographers for Assignment 4 as his style of photography was not one I warmed to.  Have I changed my mind?

Robert Adams.

He is best known for images that show how man's influence and the urban landscape encroaches on nature in the American West.  He portrays the banal and often ugly, whilst at the same time providing hope that nature will persist and be more powerful than human influence.  This reminds me of the work of Jitka Hanzlova whose photographs of Essen depict nature's reclamation of a western industrialised city.  Adam's style can be rather random (in the same way that I think William Eggleston's point and shoot approach can).  It can look emotionally distanced and even ugly.  He often uses cloudless skies which echo the typically blank skies of the early photographers of the American West who were part of the survey teams.  This was a product of the wet-plate colloidon process used in the production of their images.  Robert Adams seeks out the ordinary and banal and portrays the world as it is unlike his namesake Ansel who sought out the extraordinary and portrayed the world as always beautiful and a cliche.

Mobile Home Park, Colorado.  On the edge of dramatic landscapes Adams chose to photograph this 'ugly'  view and the girl having to live there.  The sky is blank, presumably blue.  Perhaps in time nature will reclaim its own.
Fay Godwin

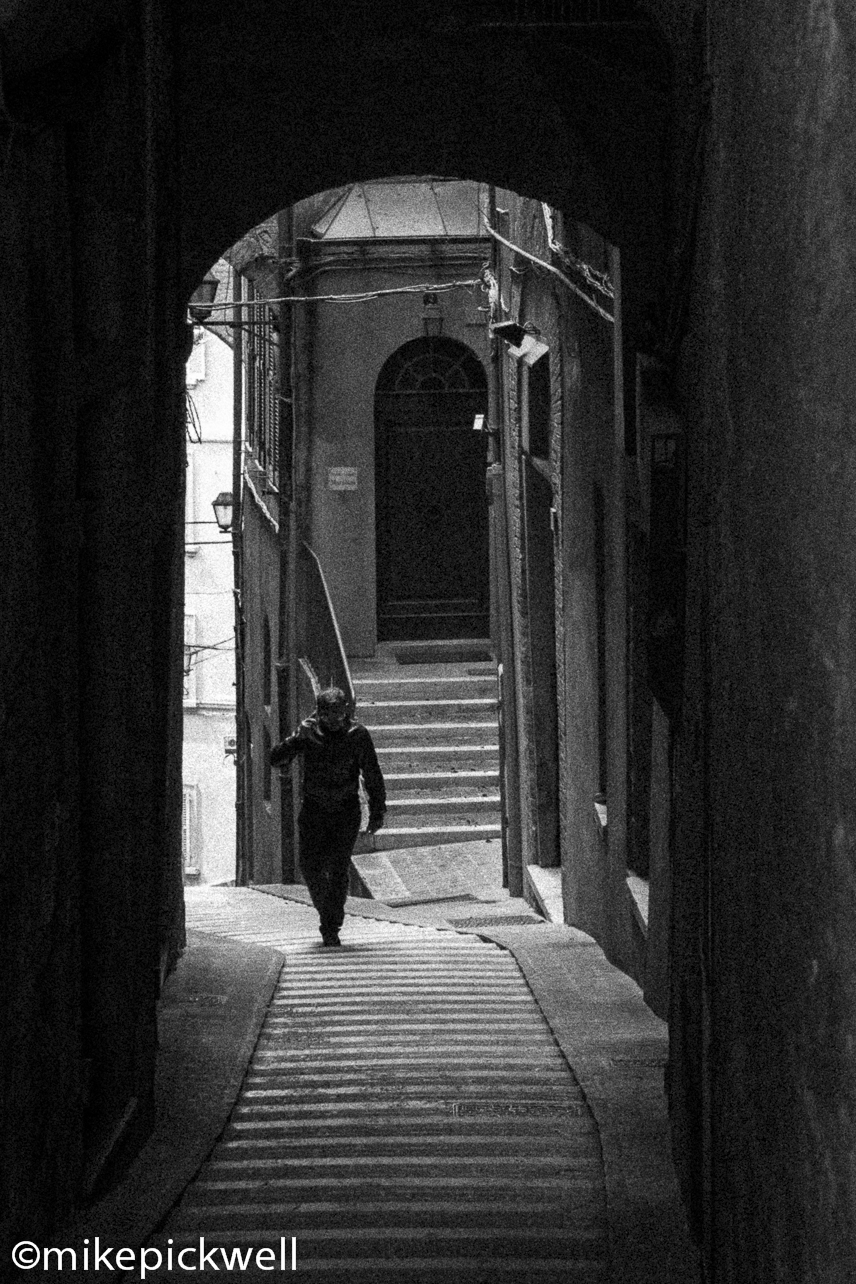
Fay Godwin's work is in black and white and is characterized by her portrayal of the unremarkable and 'gentle' British countryside using both 35mm and medium formats.  She is not afraid to portray  'ugly' man-made intrusions such as in her Pillbox Appledore, featured in her book 'Land'.  She does, however, unlike some other photographers manage to make them look beautiful.
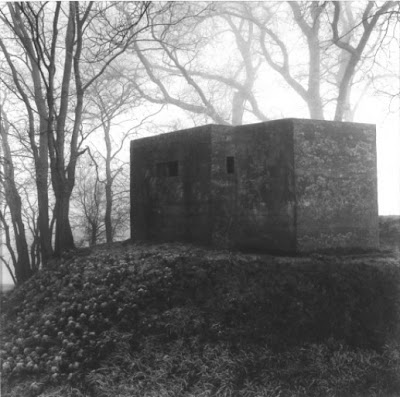
Pillbox, Appledore
 She was also a keen hillwalker and was president of the Ramblers Assosiation from 1987-1990 and another aspect of her style was her photographs of the wilderness areas of Britain often moody and in poor weather conditions.  She also portrayed archaological evidence of man and I especially like Black Sky at Callanish shown below and in her book 'Land'.
Black Sky, Callanish
She often worked closely with writers and poets who were drawn to her work.  One such is John Fowles who wrote an essay introduction to 'Land'
Like Ansel Adams she was a confirmed environmentalist and conservationist and was appalled by the ravages that man has perpetrated on our landscape.  Unlike Adams, however, she included such ravages in her photographs.  From the 1970s she increasingly photographed such subjects as rotting cars lying in lagoons, a hawk hovering threateningly over a bunker on Dover cliffs, sheep lining up to stare over a military canal, shacks and caravans littering the countryside, pill boxes marching along the beach.  Her book 'Forbidden Land' (published September 1990) is a well-argued attack on the destruction of the countryside.

Eliot Porter

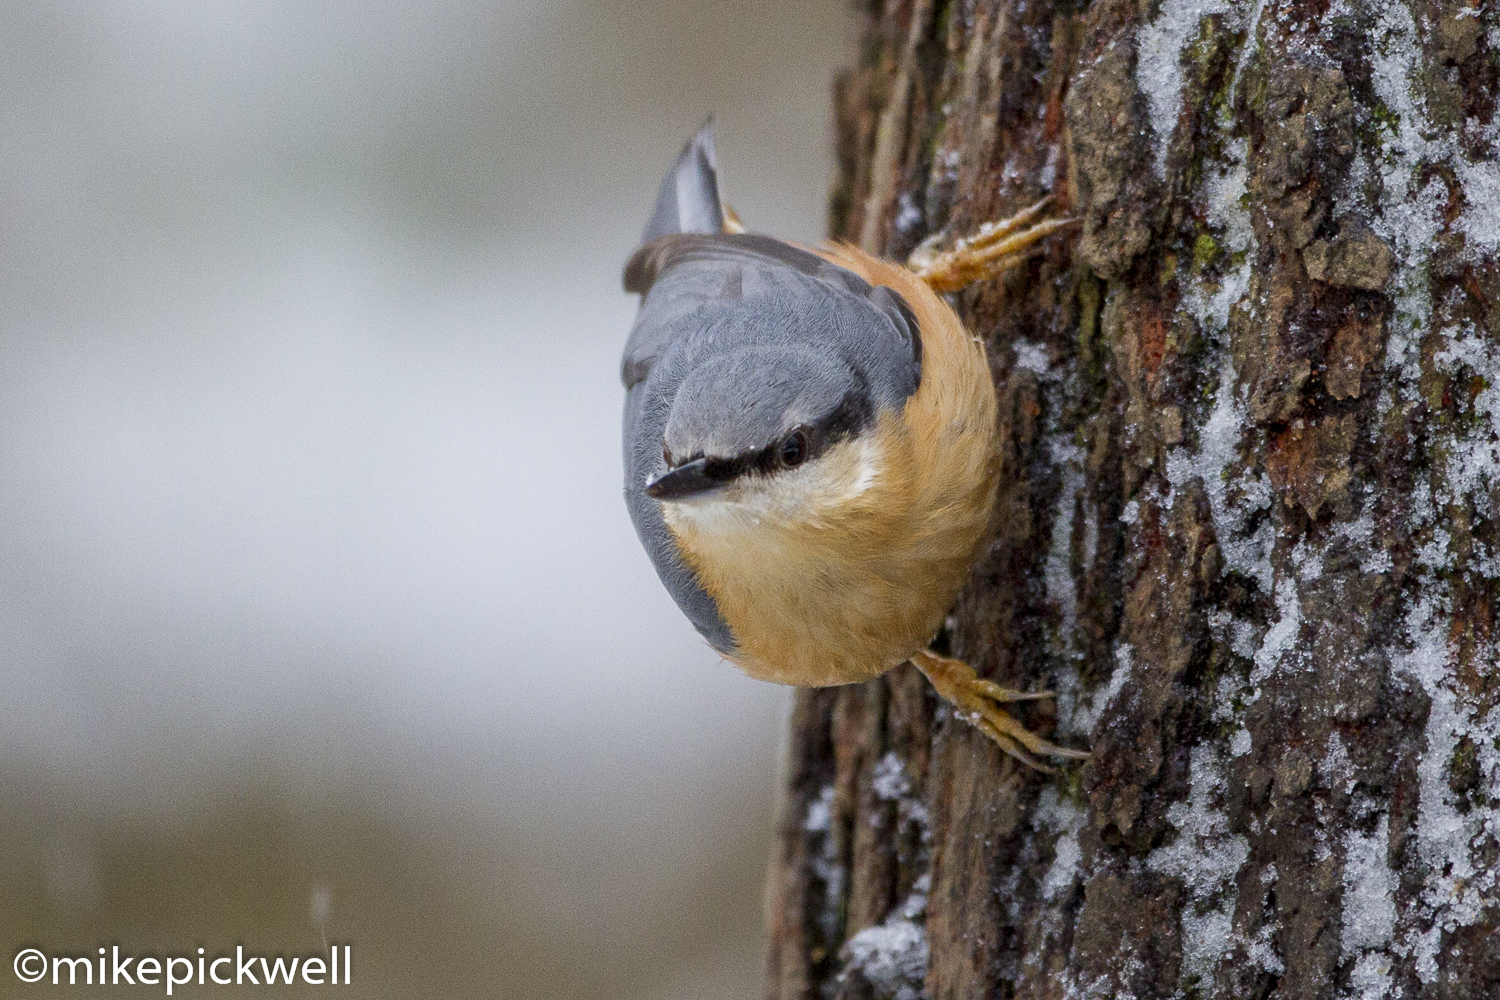
Eliot Porter is widely regarded as the forefather of colour landscape photography.  As well as specializing in colour, he also used large format and spend a great deal of time getting colour film to produce the range of tones he needed.  He had a passion for birds and photographed them all his life.  This is enough of a challenge with today's digital bodies and long, fast lenses never mind with large format.  He specialized in biological images and close landscapes, often in great detail and with no sky.  He was another committed environmentalist.  Although he became the first established artist-photographer to commit to exploring the 
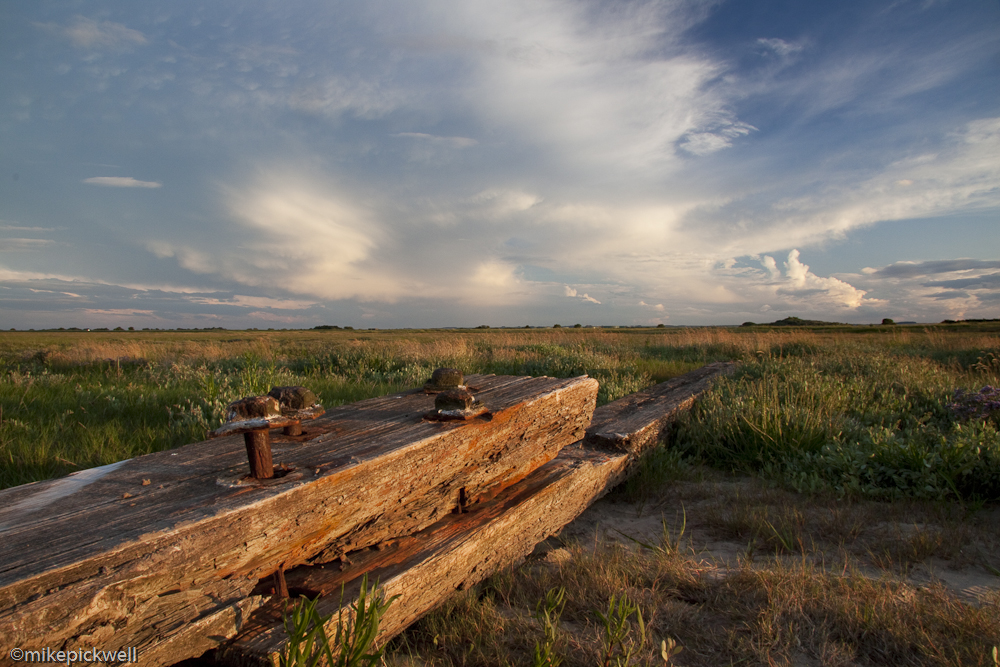
colorful beauty and diversity of the natural world, he was not widely recognized until the Sierra Club published 'In Wilderness Is The Preservation of the World' which contained many of his trademark detailed close-up landscapes.  This style continued with 'Intimate Landscapes' in 1980. One of my favourite images is
Sculptured Rock taken in Marble Canyon, Arizona in 1967.

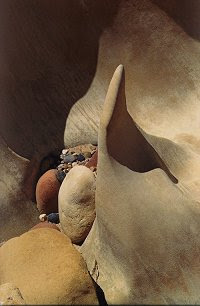
Sculptured Rock, Marble Canyon, Arizona, 1967
I decided to finish with a current British Landscape photographer and a personal favourite:

Joe Cornish

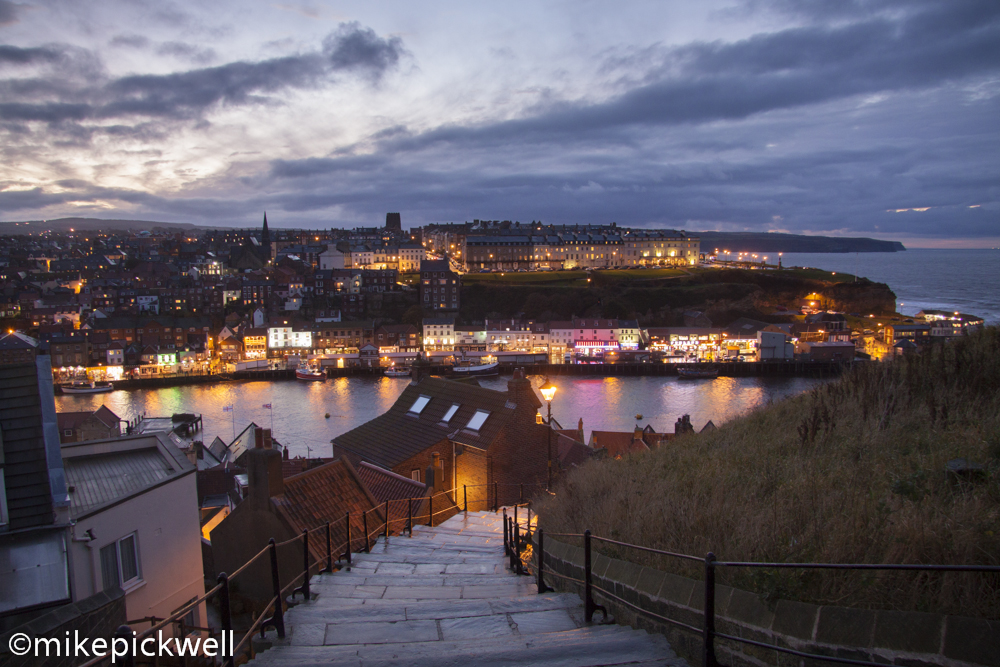
Joe Cornish is a British photographer who specializes in working with large format ( Ebony 45SU handmade 5x4 non-folding wooden field camera) and film ( Fujichrome Velvia).  His style is one of spectacular British Landscapes often taken in dramatic lighting.  Like Galen Rowell his images are well saturated and skies are balanced using the Lee ND grad filters.  Although he doesn't run around trying to get lots of shots, unlike Ansel Adams, he is not afraid to take more than one exposure and will bracket shots to ensure correct rendering of light and colour.  Although he can be spontaneous, like Adams he is a planner and visualizes his photographs.  Light is his main criterion for a powerful image followed by composition and space.  In fact his book published in 2002 is called 'First Light'.

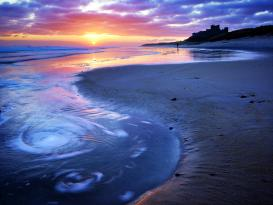
Bambugh Castle.  A typical use of dramitc light on a spectacular landscape.

Project 26: shooting the moon 5

As mentioned in my last blog on this project, I had used the Photographer's Ephemeris to determine the time of the full moon rising over The Humber.  As mentioned November was a wash out but the situation occurs monthly at full moon. i.e. the moon rises at twilight.  December also turned out to be a washout but also Boxing Day so not the easiest time to get out.  The full moon in January was yesterday (27th January) and miracle of miracles the sky remained clear.  All was looking good but unfortunately the sun set at 4.36 but the moon didn't rise until 5.26 so twilight was really over and it was more or less dark.  The moon rise was stunning.  It was virtually red as it peeped over the horizon and rose majestically above the sea as an orange ball.  Magnificent.  As it was virtually dark and the light level from the moon was very low  I could only get 1/4 of a second at f4 with my 500mm lens even at ISO 1600.  It was also very winy and despite using a tripod, mirror lock up and cable release there was some camera movement and, of course, the moon is moving surprisingly fast.  Like Ansel Adams I had previsualised this image and the resulting photograph was all that I could have wished, but sadly not pin sharp as I would have liked.  I include it below.

The Full Moon rises above the shipping in The Humber.
What Have I Learned
At moon rise it is possible to use a long lens and have the moon appear huge against land (or sea) based objects.  It also has a wonderful orange colour caused by the large amount of atmosphere its light has to travel through.  As the re is so little light provided by the moon at this time the shot needs to be taken at twilight after the sun has set but well before it is totally dark so that the remaining daylight enables a fast enough shutter speed to keep everything sharp.  In future months moonrise and sunset are closer together so I shall try again and hopefully be successful before I complete this course.

Tuesday 22 January 2013

A Morning with Nuthatches and Jays

I regularly visit the feeding station in a local woodland to photograph the birds visiting it.  We are very fortunate in Grimsby to get nuthatches here which is fairly unusual on the east side of the country   They are both a challenge and a joy to photograph.  However, jays are also present in the wood but generally they are extremely wary and shy birds, which do not come down regularly to the feeders.  The recent cold weather has made them less cautious and yesterday I was lucky enough to have five birds down at once.  Some images are shown below.  All shots were taken with a 500mm lens.  As a fast shutter speed  was required to stop movement I had to use f4 and ISO 1000.  I was delighted that I didn't need to use my noise reduction software.

Nuthatches are attracted with peanuts and sunflower seeds.  They also like fat mixed with ground peanuts.

They tend to scuttle headfirst down a tree and pop out for the food where you are not expecting.


A classic Jay pose.  This bird has just been driven off the peanuts by a rival and its crest is raised in a threat posture.
I'm not greedy, I'm just trying to see how many peanuts I can get into my beak!


Project 35: using a polariser

I actually took the photographs for this assignment before I completed project 33 on using a tripod.  As I was out hill walking I fell into the trap of being lazy as I explain in the blog for Project 33.  It is all too easy to decide to leave it in the car when I am carrying a heavy rucksack anyway.  I feel even more humbled when I think of the heavy loads carried by Ansel Adams and Joe Cornish.  I must get into the habit of using my walking pole which has a tripod bush in the handle.  All I would need to carry then would be my lightweight tripod head.

For the first part of the project I took pictures when I was out walking with my brother in Derbyshire on Derwent Edge above Ladybower and Derwent Reservoirs.  It was during a cold spell and we had had snow but this morning dawned bright and bitterly cold.  Kinder Scout was on the horizon at right angles to the sun with a bank of cloud just above the horizon so perfect for using a polariser.

For the second part I was out walking in the Lincolnshire Wolds and came across a trout lake which fitted the bill perfectly even down to the rocks under the water.

I images are shown below:

85mm lens setting
As we climbed up onto Lost Lad I noticed that there was a lovely bank of cloud hanging above Kinder Scout on the horizon and at right angles to the sun.  For this picture the polariser was rotated so it had no effect.
The difference in this second image is amazing.  Here I rotated the polariser through 90 degrees to get the full effect.  The sky is darkened and the clouds stand out beautifully.
17mm lens setting

Using the same view I set the lens to its 17mm setting and rotated the polariser so it had no effect.

Here the polariser was rotated to give the full effect and this is very noticeable.  The clouds stand out and the sky is very much darkened to the right of the shot on the side furthest away from the sun.  At this wide angle setting the lens covers more of the sky, including areas closer to the sun where the light is not polarised.
Photographing water with a polariser.

In this shot of a local trout lake in the Lincolnshire Wolds I rotated the filter so it had no effect.

In this shot, where the filter has been rotated to maximum effect it can be seen that many of the surface reflections have been removed and the rocks and detail on the bottom of the lake can now be seen more clearly, particularly in the foreground.
What Have I Learned
A polarising filter can be used judiciously to darken a blue sky, bring out detail in the clouds and increase saturation in the image.  It can also reduce reflections on water.  It can, however, be overused, especially with a wide angle lens where the effect is uneven.  It works best with standard focal lengths to medium teleohoto.  The best effect is seen when facing at right angles to the sun and there is litte effect when in line with the sun.  To my knowledge it is one of the few, if not the only filter, whose effect cannot be duplicated in today's processing software packages.

Saturday 19 January 2013

Project 33: using a tripod

As a general rule I tend to make a great deal of use of my tripod.  Actually I use 2: a lightweight Manfrotto carbon one when I am carrying it far and a more robust carbon Feisol.  I have a couple of ball heads of different weights and a gimbal style head which I use with my 500 lens for bird photography.  There are times however when I choose (am too lazy) not to use a tripod and hand hold.  This is generally when I am out mountain walking, but then I tend to use a walking pole with a tripod bush, or when using a very fast shutter speed for bird flight shots.  I always use a tripod for macro work.  Recently I have thought tjhat some of my landscape images are not as sharp as I would like so I am not only making it a rule to use one, but I am I am using f16 to avoid the fall off in lens performance at smaller apertures and I am also using mirror lock up a cable release.

Below are the 3 pairs of images that I have taken for this project.

With tripod
No tripod
With Tripod
No tripod
With tripod
No tripod
The first two pairs if pictures were taken in Irby Dale on the edge of the Lincolnshire Wolds.  Both are wide angle shots and although there is less sharpness in the shots without a tripod when viewed large the difference is not too significant.  The final pair of images was taken at Worlaby Carrs, a site I visit to photograph the short-eared owls that congregate there during the winter.  Here I shot at 85mm and by using a short telephoto and 100 ISO  it can clearly be seen that the none tripod picture definitely lacks sharpness.

What have I learned.
Using a tripod helps to achieve crisp, sharp images.  It also allows the use of low ISOs and small apertures which mean greater depth of field and no noise.  Using a cable release and mirror lock up also helps to achieve sharp images as the vibration from 'mirror slap' is removed or reduced and there is no movement generated by physically depressing the shutter.